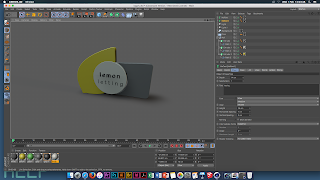
In this process and production lesson we were working with cinema 4d. This is the software I am least comfortable with, however throughout this workshop it did start to make sense in what basically could be achieved. We started of obviously simple, with just a logo design to be made 3d.
In order to keep track of works, a document folder was created that would contain the outputs, artwork and the cinema 4d files.
Next we created the logo outlines for the cinema 4d file. These were instructed to be closed paths, as these would be able to form the 3d shapes then. I just created random shapes here using the pen tool, pre set shapes and shape builder tool.
This file was then saved in the artwork folder of the cinema 4d file. One saved the pop-up box below shows up, here the feature which says "illustrator CC" has to be changed to "illustrator 8" as this is an older recognised version for the software.
Above the smaller screenshots show the process of setting up the right render settings. This file was then saved, as this can act as a template for all outputs and can be utilised for other projects now.
Here shows the further settings that were pre-set before saving the template document.
I learnt that in cinema 4d, the files that are being worked with aren't places like in adobe software, but are "merged" in.
Below shows the outline of my logo once in cinema 4d. We were advised to only manipulate how we viewed this shape with the controls at the top right of the frame.
There is the object shown from multiple angles, the 4 view is shown directly above here.
Using the live selection tool, each path inside the logo object can be selected. The tool bar on the right and side displays what is being selected by illuminating a darker orange.
Next the extrude feature is added to this right tool bar, above the paths. This creates the 3d objects. In the options for this feature just below the "hierarchal" tab is selected and the the movement of the width of the 3d shape in manipulable.
Gouraud shading lines are then added. Shown in the top left of the screenshot.
From this then a fillet cap is added. Under "caps and rounding" on the extrude options.
Next we produced the materials which would be used to add texture and colour to the different shapes created.
These can be seen below. The colour, reflectance (specular) can be edited to produce the finish desire.
Below shows the colours in use here.
And below the object window, the materials are listed at the foot of the screenshot as the ones which have been previously created. They are dragged and dropped on to the areas which they are desired.
Black shading can also be used for the background colour.
Next a floor and background were added. From the taps at the top these can be added, and then too will appear on the left hand side tool bar of features in use.
After manipulating these features, the result is shown below. Also a light is then added to the work, this will increase the look of the 3d features.
The light settings are then adjusted below.
The light is easy to adjust and move around when in the 4 view mode. As the light is shown with in comparison to where your artwork is.
(Practice render to see how it appears so far) Shadow maps were also set to soft here, so there is a small cast shadow on the "floor" of the piece.
Another render is shown here which uses the light with a slightly different colour tone. Both Blue tinge light and yellow tinge light were experimented with.
Below shows the changing of the light tinge.
Next "MoText" was added form the drop down menu at the top.
Series of manipulations then took place in order to get it to contain the message intended. Changed in typeface and size could also be experimented with, as well as the depth of the text from the logo paths. Colour, tone and shade could be manipulated just with as the material creator previously.
A few variations are seen above.
As experimentation the material options were changed and played around with. Changed in luminance, and glow give slightly different effects. Some of these option changed however require Ambient occlusion turned on for the effects to remain after rendering.
Lastly a camera was added. Just like in after effects these can be manipulated to move around the frame, and the object in the environment.
On the long tool bar down the left hand side the axis need to be enabled. And again the camera can be manipulated with these easily in the 4 view grid.
The tool bar at the bottom of the frame also included a timeline, so the camera movements can be played and viewed from this control panel.
For further manipulation of the animation the timeline (dope sheet) can be opened. This is the graph of the camera movements on the object. Spline or Linear options can be chosen whether the animation needs to be sped up doing the middle of the animation or if the animation should remain at the same speed in play back.
Above are the compression settings for rendering out then this animation. With 30 as the frame rate.
Further developments. Experimentation outputs.
("lemon letting" is fictitious and doesn't have any associate to any businesses that currently operate under this name.)
With these skills I was able to finish off the name I'd created on cinema 4d last year.


